How to embroider pattern on clothing by hand
Embroidery not only brings unique beauty to clothes but is also a way of entertainment for many women. This article will show you how to embroider a pattern on clothing by hand.
As a side note, in this article, I will also list ways to embroider patterns on clothing using various embroidery styles. I am Vietnamese and these embroidery techniques also come from Vietnam. Therefore, it will probably be quite new to you. However, they are not too difficult to do, just focus on this article, I believe you can do it!
About common ways to embroider patterns on clothes by hand
Embroidering patterns on clothes is the best way to add a personal touch to your outfit. If you don’t want your shirt to look too common, embroidering a pattern on it can be a great way to go. You may be thinking that embroidery is a difficult task only for people with a little talent. However, I emphasize practice. Do it and do it again, the stitches will become more beautiful!
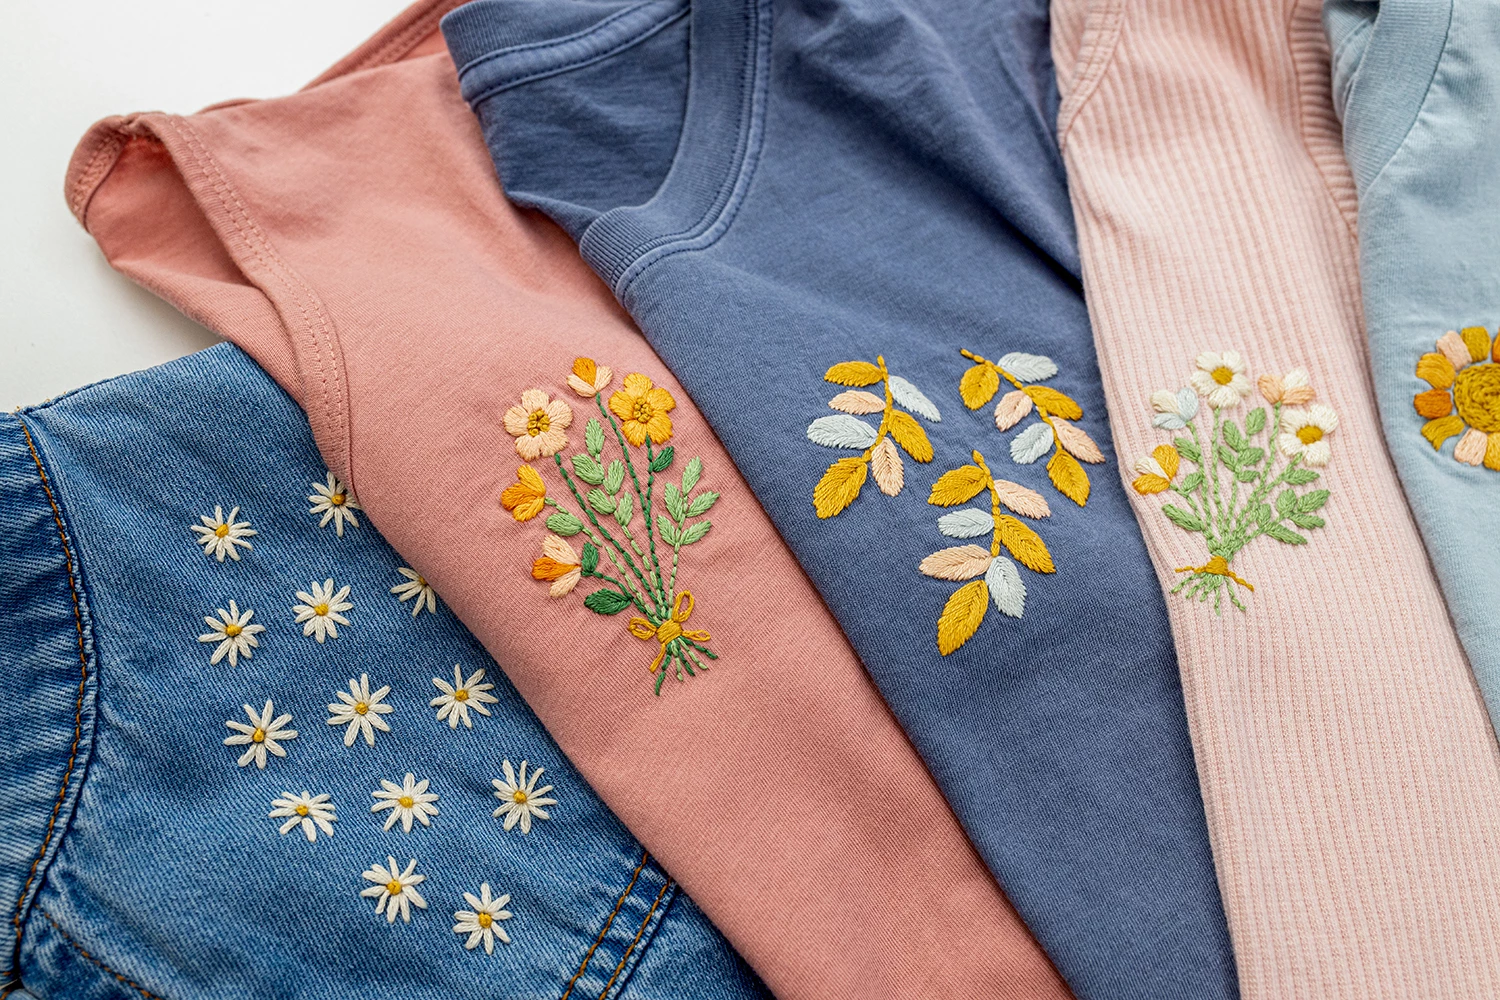
I have come across many tutorials for embroidering patterns on clothes but the two most commonly used methods are embroidering directly on the garment and embroidering separately and then sewing it onto the garment.
- Embroidering directly on the garment: The advantage of embroidering patterns directly is that it is less time-consuming. In addition, this type of embroidery can be embroidered on most positions such as chest, sleeves, hem,…
- Embroidering separately: Using a piece of fabric or badge to embroider patterns and then sewing them onto the shirt. Embroidering separately takes time to attach to clothes and consumes more fabric, but in return, if it is for beginners, this is the safer method.
This article will introduce to you how to embroider directly on the garment. Let’s explore!
Prepare hand embroidery supplies
To start embroidering pattern on clothing, you will need to prepare some necessary tools such as needle and thread, embroidery hoop, sketching pen,…
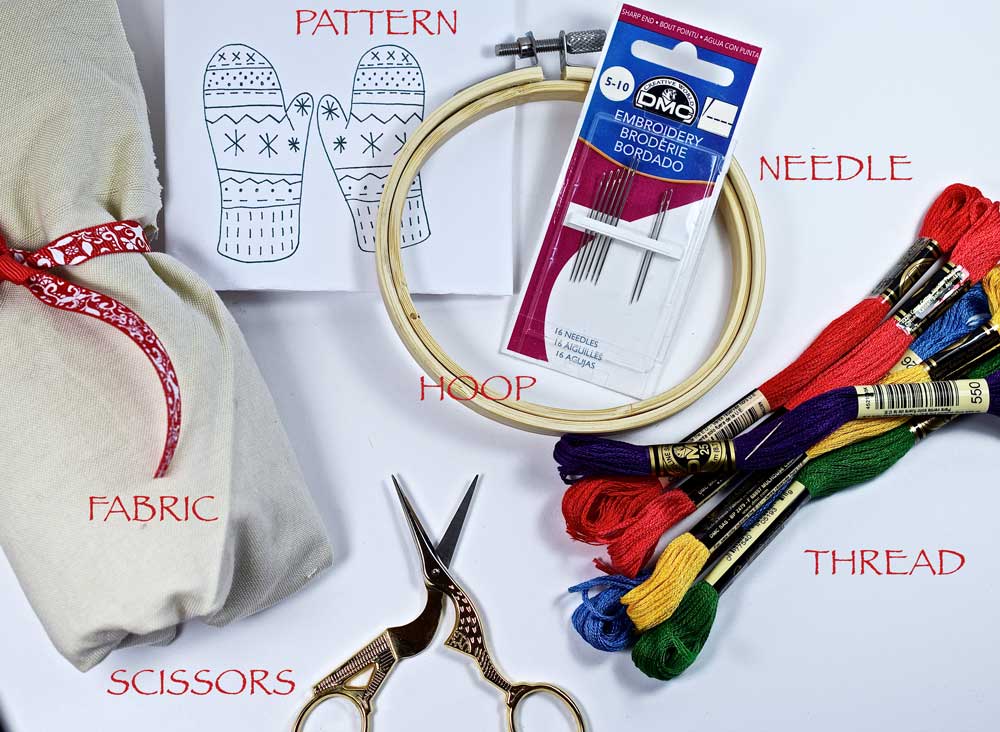
- Embroidery thread: There are many types of embroidery thread. I often use Elastic thread because it is very durable, and smooth, does not fray, and especially the color is very beautiful. Determine the color of the pattern to be embroidered to prepare different colors of embroidery thread.
- Embroidery hoop: Has the function of flattening the fabric to help you embroider patterns on clothing more easily. There are two types of embroidery hoops: plastic and wooden, with the same uses. You can find them at embroidery supplies stores and remember to buy 2-3 small embroidery hoops to embroider in many different positions without having to take them off and on, causing deformation of the clothes.
- Sketch pen: You can use a Marvy Uchida pen or similar types to sketch patterns on the fabric. If you don’t know how to draw, choose a pattern online and print it out on paper, then punch a needle hole in the line to be embroidered, place it on the fabric, and use a pen to paint over the hole to make a mark.
How to embroider pattern on clothing by hand
There are many ways to embroider patterns on clothing by hand with many different types of embroidery stitches. In this article, I will introduce to you some basic embroidery stitches that are easiest to perform. Each stitch style will also come with an instructional video, which I found easiest to understand on Youtube. Let’s see now!
1: Stem stitch & satin stitch
2: Blanket sitich
3: Backstitch with satin stitch
4: Satin stitch & stem stitch
5, 8, 11,12, 13: Chain stitch
6: Backstitch
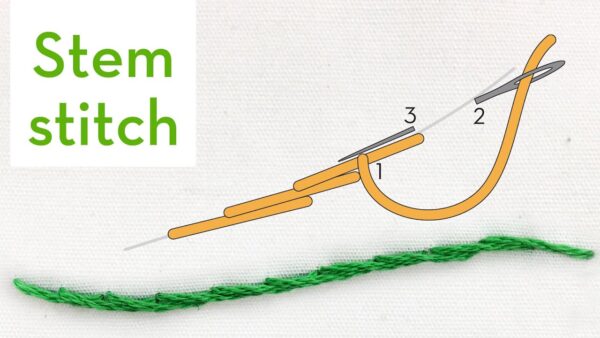
1. Stem stitch
Insert the needle up and down about 3-7 mm then insert the needle at a point about the middle of the first stitch, the embroidery thread is on one side of the needle. The next stitch inserts the needle down a distance from the first stitch, then continues with the next stitch until the end of the row.
2. Running stitch
Insert the needle from the bottom up and down at the appropriate length for the image to be embroidered. Usually, the nose is about 3 – 5mm long, and the up and down stitches are evenly spaced.

3. Chain stitch
Chain stitch, the right side of the embroidery line is small loops of thread hooked together like a chain, and the left side is equal stitches, connected one after another.

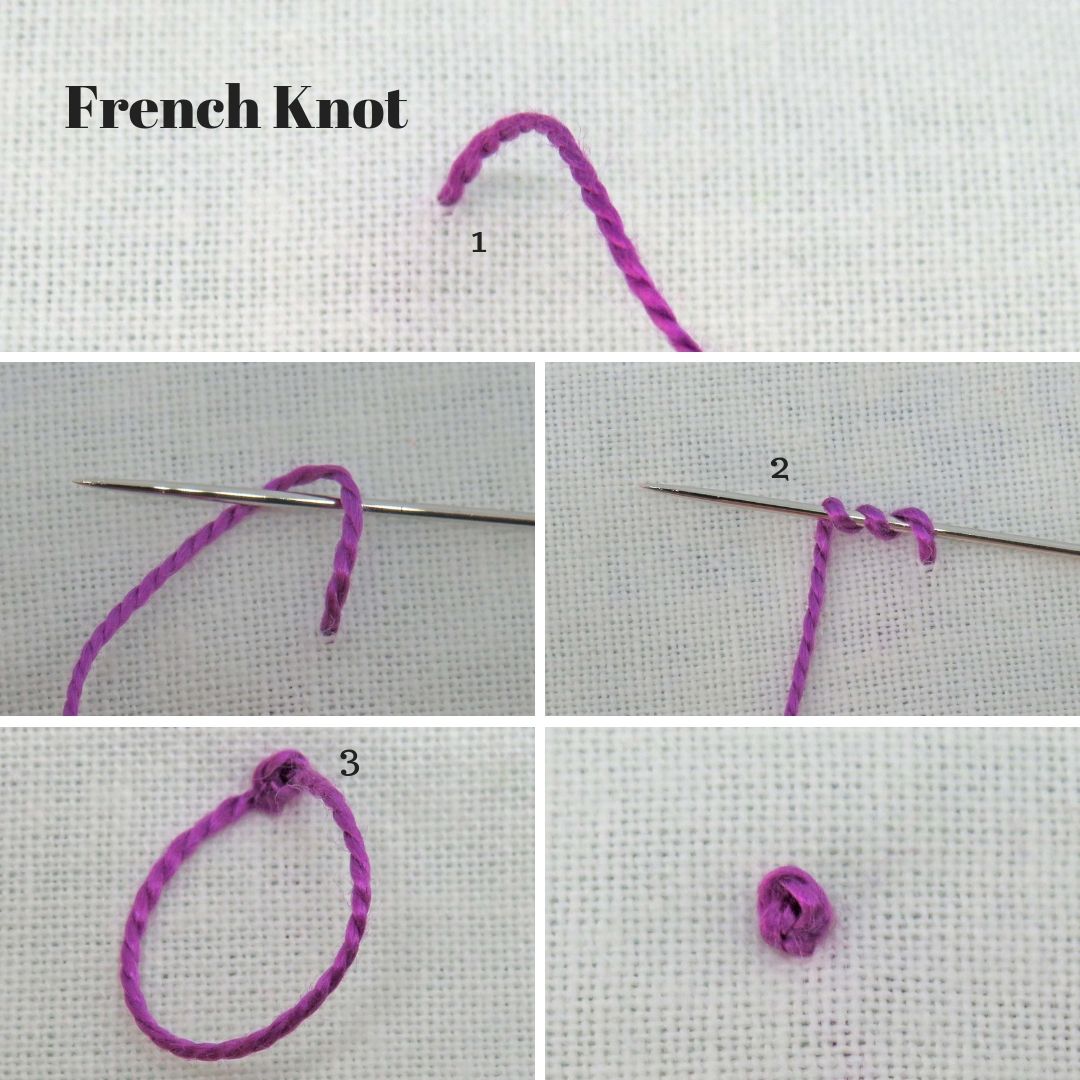
4. French knot
With a thread, wrap it many times in front of the needle tip stab it vertically into the fabric, and hold it in place by pressing the needle to form small round beads. The difficulty is to make the thread knot very neatly, round, and evenly spaced with ten beads as one. Often used to attach to the small pistils of apricot flowers, peach daisies, lilies… to highlight the petals.
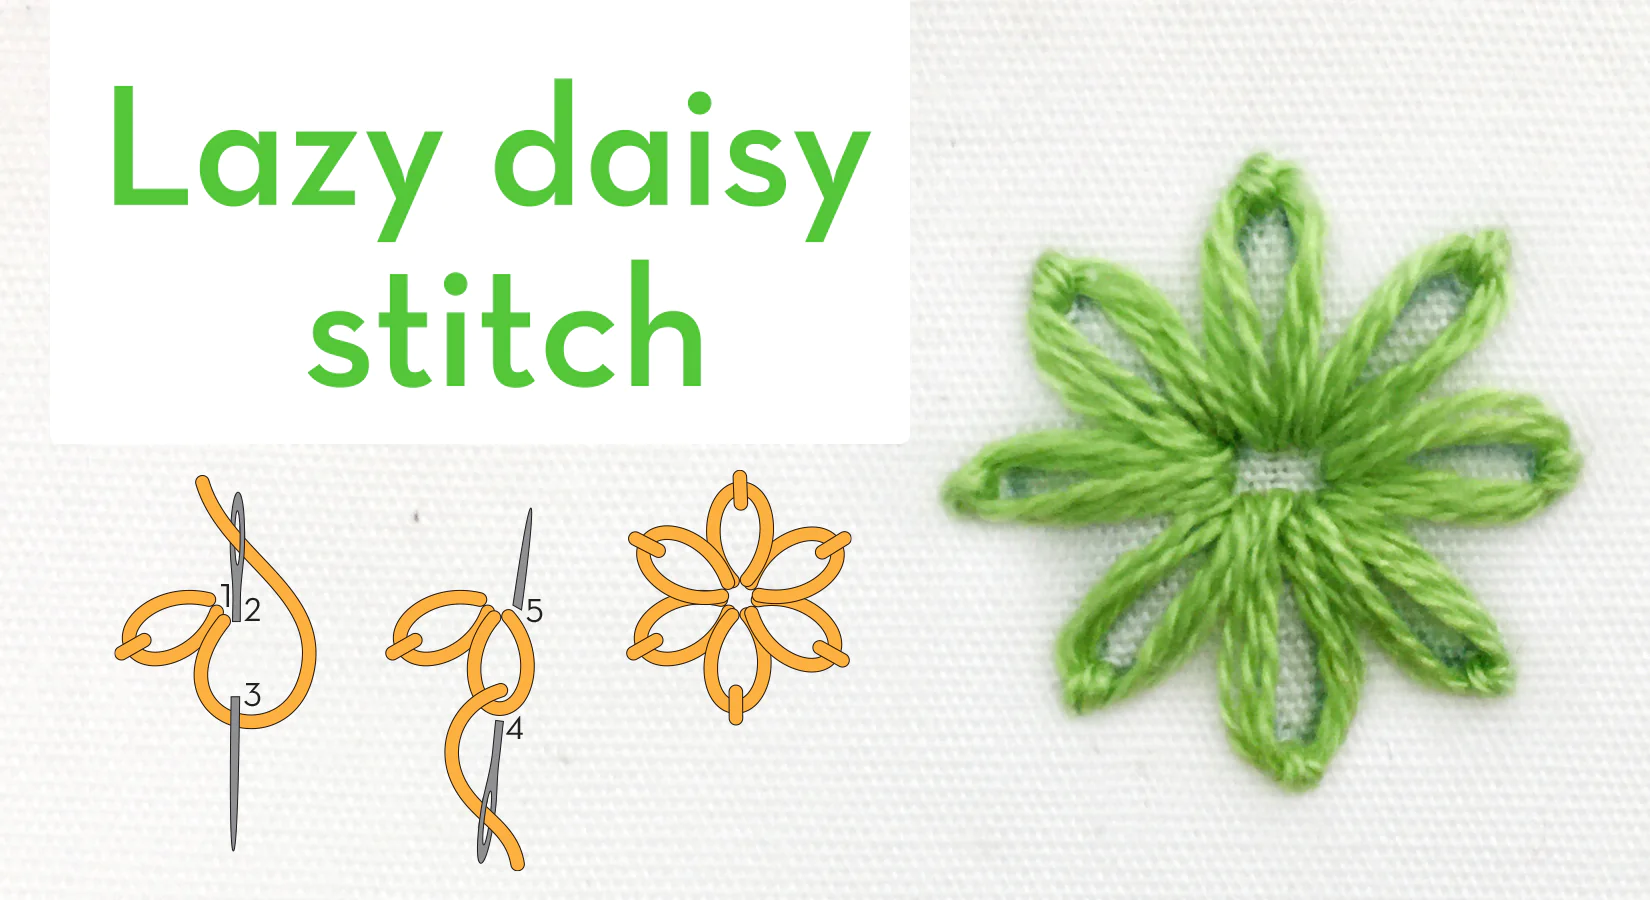
5. Lazy daisy
Stab the tip up and stab down at the position of the tip up. Then, stab another stitch up at a position equivalent to the desired length and loop the thread through the segment created from the original stitch. Insert the needle down at the previous position.
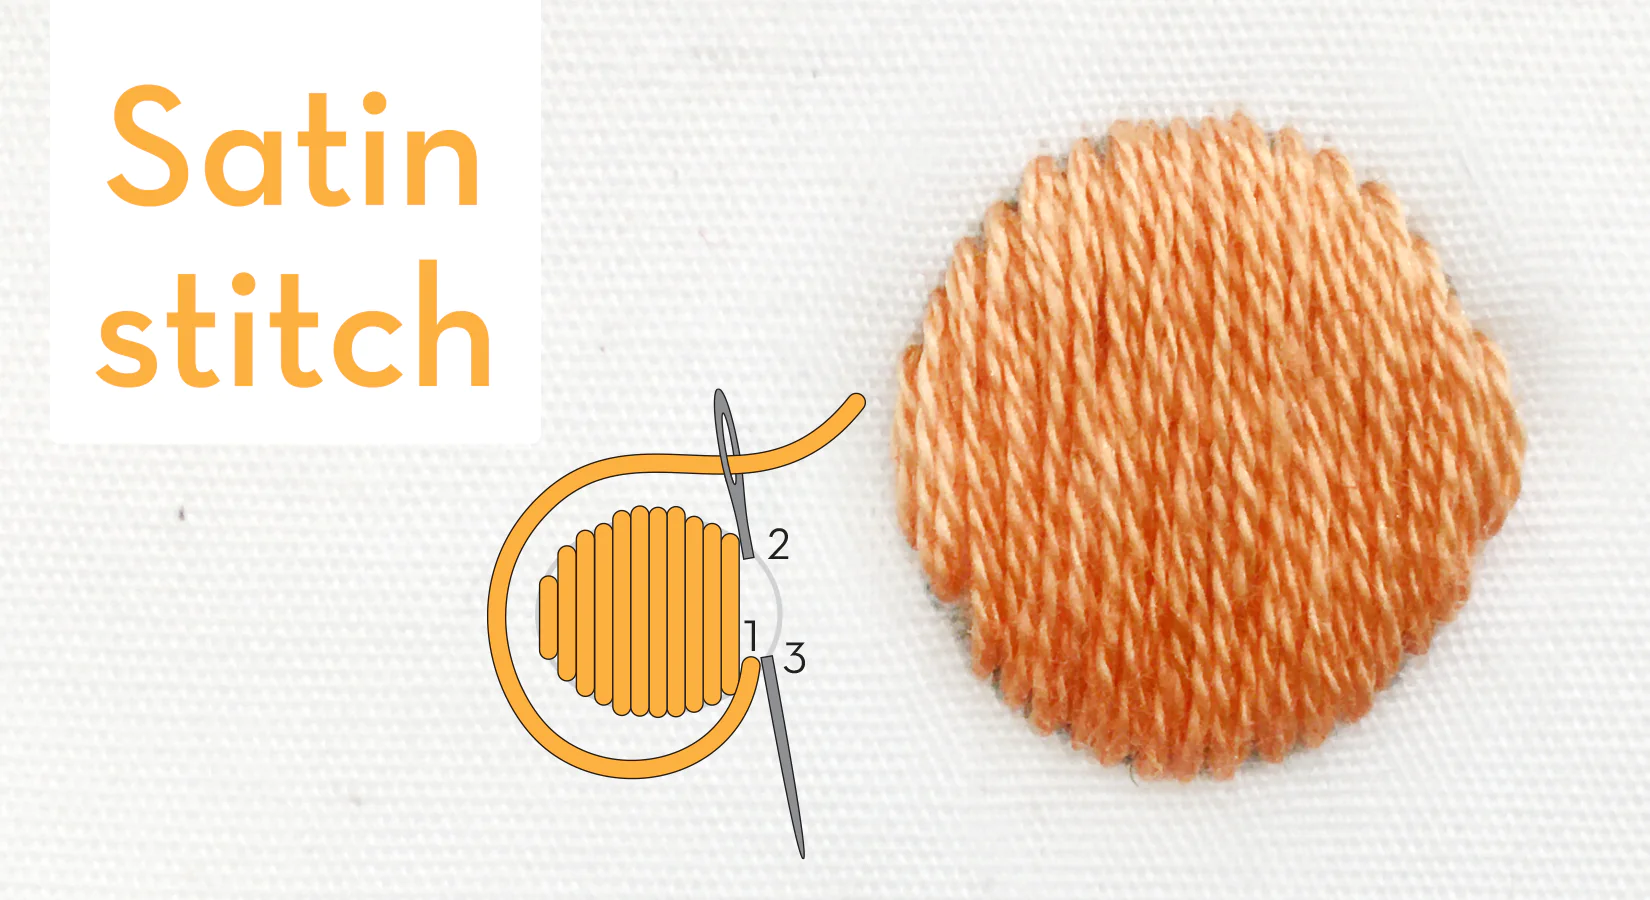
6. Satin stitch
Embroider from right to left, from top to bottom. When embroidering, you need to hold the thread with the foot according to the drawing, the thread tip is even and the thread surface is smooth and not jagged. You can embroider on both sides of the thread.
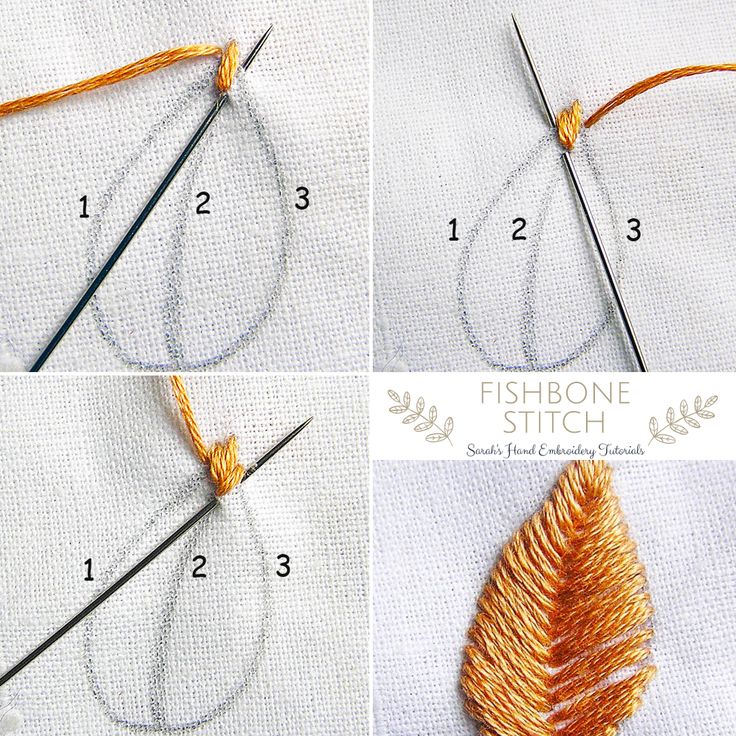
7. Fishbone stitch
Stab up at the tip of the embroidery and then down about 1 cm away so that the stabbing position is on the axis of symmetry of the embroidery. Then, poke up at the position next to the first stitch and then put the needle down at the position next to the hole where the needle pokes up at the second stitch. Do the same with the symmetrical side of the embroidery. Do this regularly once on each side until the end of the embroidery.
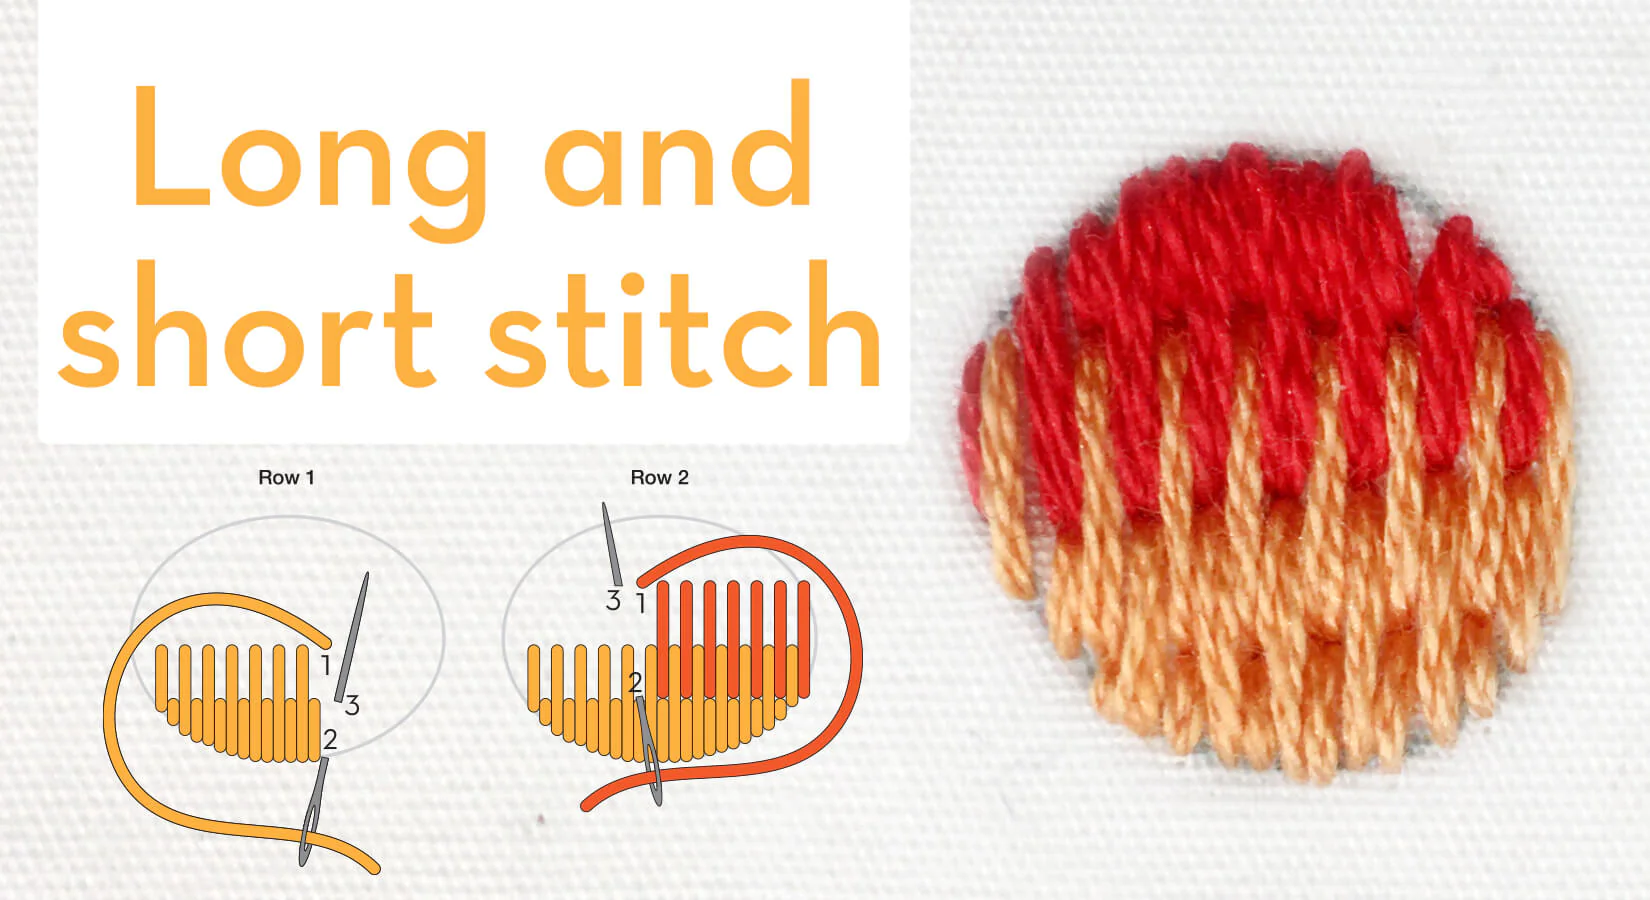
8. Long & Short stitch
Embroider short and long stitches staggered into the gaps between the previous embroidery threads, creating a large patch of embroidery with changing colors and shades.
Find more: How we make handmade napkins?
 |
K-Embroidery is one of the largest embroidery factories in Vietnam. We are a professional manufacturer, with outstanding products in hand embroidery, hand smocking,… especially children’s clothing products, meeting STANDARD 100 by OEKO-TEX® standards. If you are interested in our services, you can learn more at: About Us, Catalog,… |
This is the tutorial from K-Embroidery on how to embroider patterns on clothing by hand. I hope this article was helpful. Leave any questions you have in the comments below, and I’ll do my best to answer them.


